Tags
For this lab I decided to do my screen cast on it!!!!!!!!!!!!!

15 Tuesday Nov 2016
Posted in Net701
Tags
For this lab I decided to do my screen cast on it!!!!!!!!!!!!!
15 Tuesday Nov 2016
Posted in Net701
Tags
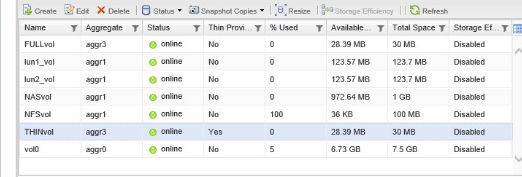
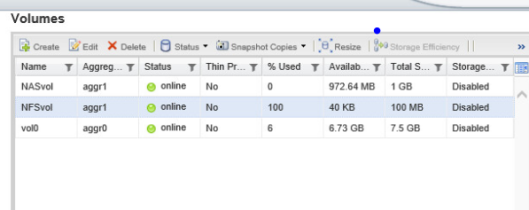
At this point in the lab I didnt have a lot of space left, something tells me this was intended, the first task was to explore the volume space, what had been used up and what was left.

The next task is to create a new volume in aggr3 called FULLvol
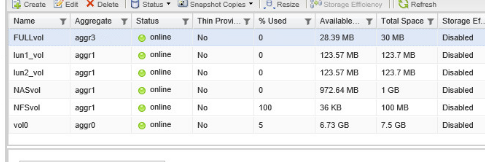
and then a volume in aggr3 called thinvol
Then moving on from this you mount both drives in the linux box, and then write 100% full to each volumes to see the difference and then look at the total space in aggr3. You then also have to create a Volume in the CLI and mount and then write a 10MB file to it and analyze the results.
The next tasks is to configure deduplication through the CLI, once that has been completed you have to set up Qtrees in the OCS.
and then setup a quota for the qtree
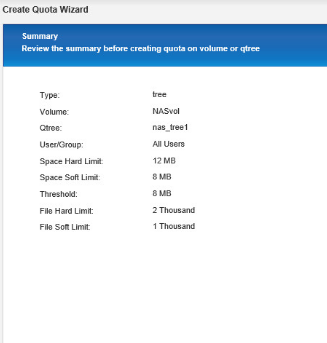
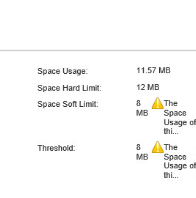
once that is done you check the quota out in the CLI and then map the network drive and transfer at least one 8MB file into the nas_tree1 directory, which automatically sets off a limit exceeded message and the OCS showed a soft limit being exceeded.
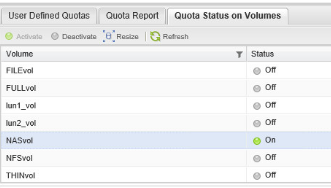
After this you use the CLI to create a quota report.
the last task is to modify the quota and implement changes to it, the first change is changing the hard space quota from 12 to 15MB
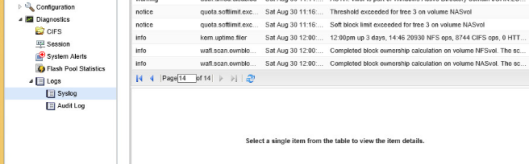
After that I had to select nas vol and click the resize button for the hard space quota to take effect. The last task of the lab was to check the Syslog.
15 Tuesday Nov 2016
Posted in Net701
Tags
The main goal of this module is to create an iSCSI LN on a storage system and then after that mount it on a windows drive for other machines to access. The first task was to make sure the licence for iSCSI was accepted and running on the Vsim
Once this had been completed I then moved to set up Microsofts iSCSI initiator service
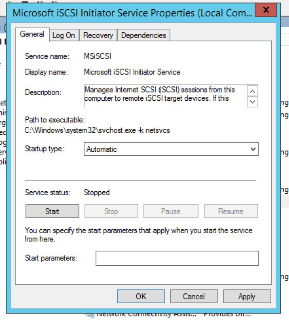
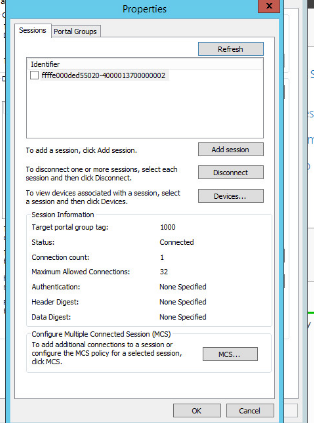
The going into propeties to make sure the initiator name had been set up properly. The next task was to make sure the iSCSI server could see the Vsim and this was done by going into advanced settings and pointing it at the right IP address.
Moving on Portal groups were set up also from the iSCSI properties Tab and inserting the correct IP addresses. Once this had been done you could see a connection had been established.
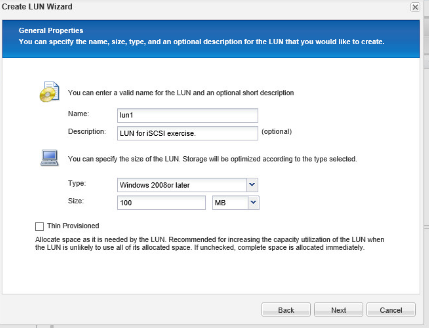
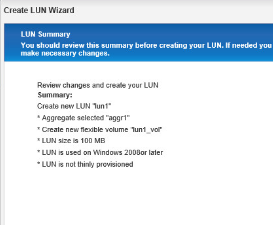
Once this had been setup the next step was to create a LUN!
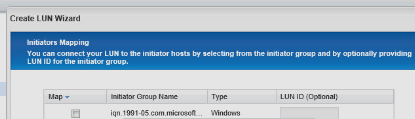
and then an initiator Group
and here are the lun details
The next step was to access the LUNS on the windows server using disk management to bring the LUNS online and initialize them. Once that has been created you need to start up the volume creation wizard to create a volume.
the last task is to move a lun through the CLI without disrupting service, the commands were provided and it was pretty simple.
14 Monday Nov 2016
Posted in Net701
Tags
The two tasks for this lab are to;
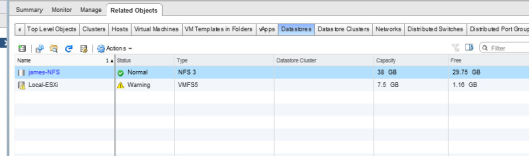
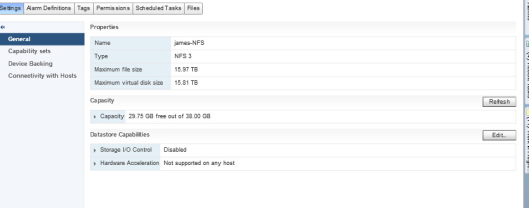
Going into the storage section and selecting data store and then opting to create a new data store will bring up the installation wizard.
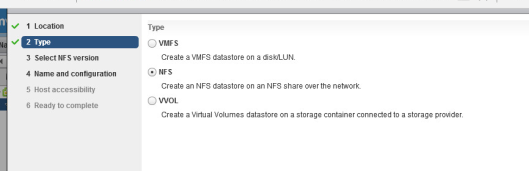
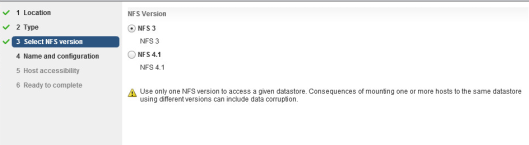
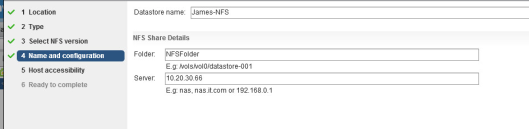
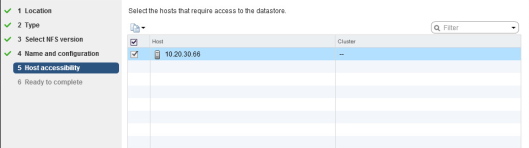

Once the steps above had been completed I ran into an issue about the NFS file path not existing and not having the right permissions. So I had to log into the Vsim through the on command system manager and setup an aggregate, volume and share and then add privileges to it so that vsphere could access it. Once this had been completed the NFS was showing on vsphere!
14 Monday Nov 2016
Posted in Net701
Tags
the goals of this lab were too;
clicking on training and selecting new distributed switch brought up the installation wizard.
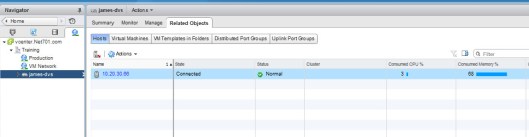
this is the outcome of the installation wizard, the next taks was to add a host to the distributed switch, right clicking on the switch and selecting add and managed brought up the installation wziard.
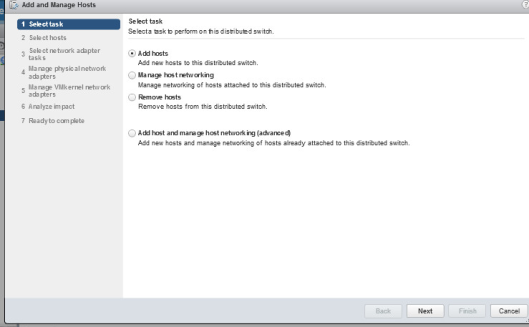
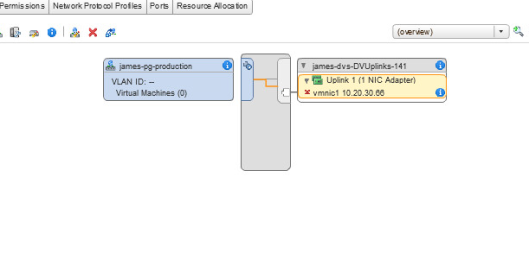
Once it was completed I was able to see the host added to the switch group. From there we had to check several settings to make sure everything had been set up and then transfer a VM over to the new switch group.
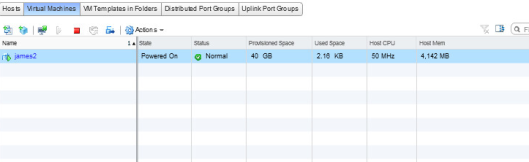
The last task was then to switch the VM back to it’s original group!
14 Monday Nov 2016
Posted in Net701
Tags
The tasks for this lab are as follows;
The first task had me navigate to the virtual switches area in my ESXI host.
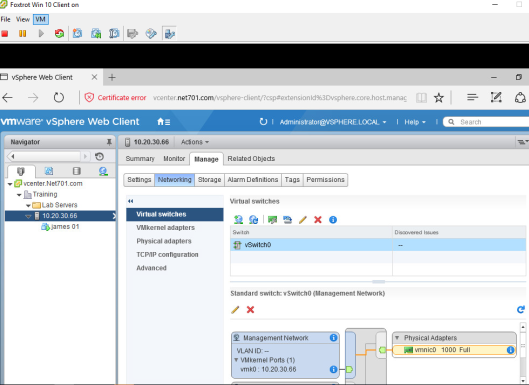
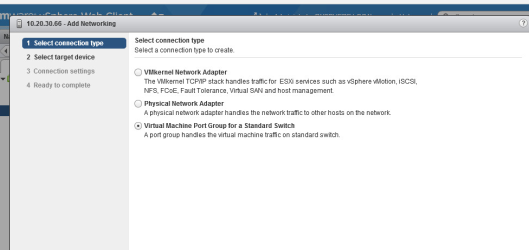
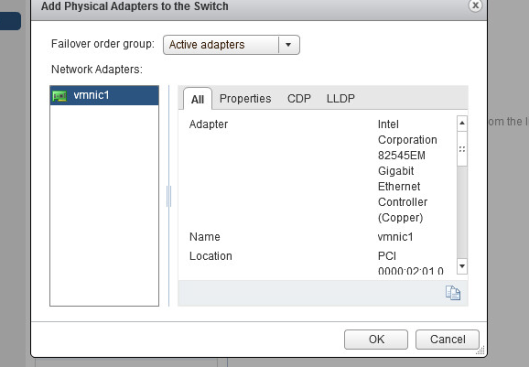
Moving on from that it was time to create my own switch, clicking the add new switch button started up the creation wizard. The first step was to select the third option as shown below.
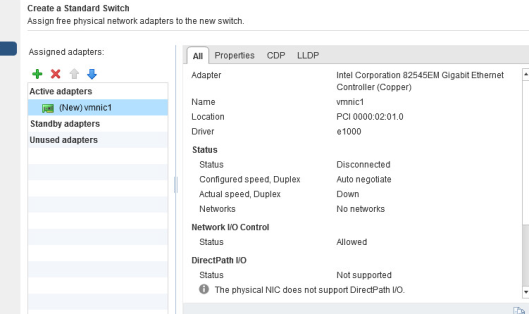
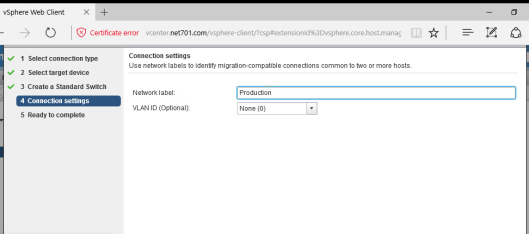
After following the steps in the creation wizard, the end result was my very own switch!
The last task was to attach the virtual machine to the switch group that I had just made, once that had been done I booted up the machine and checked out the new IP address that It had been given.
14 Monday Nov 2016
Posted in Net701
Tags
This module was based around snapshot, the tasks in it included;
creating a snapshot of NFS vol
The next task was a three part operation!
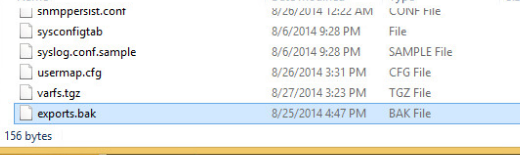
Firstly you have find a file and delete,it, exports.back from /etc:!
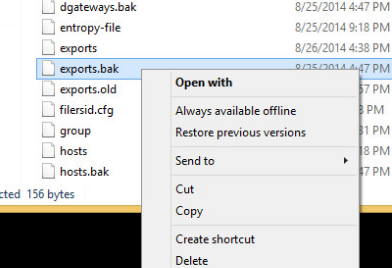
then find it in the snapshots folder!
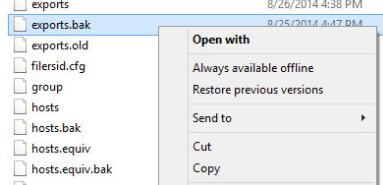
and copy it back to the original location.
the next tasks was to restore a linux file from a snapshot using the command line interface. After that we then had to use the System manager to manage snapshots.
The first task was to schedule snapshots
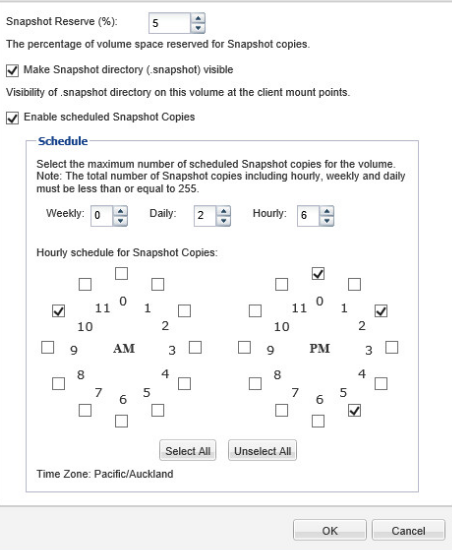
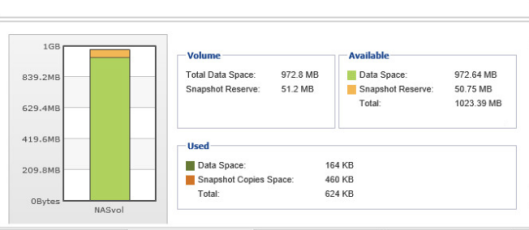
then view the total for one snapshot
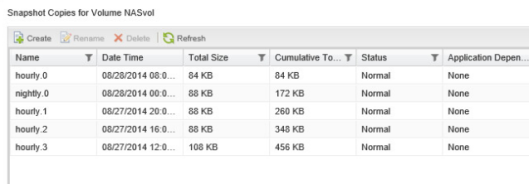
and then the total available for all snapshots.
The last task was to restore a file using windows previous version tool.
14 Monday Nov 2016
Posted in Net701
Tags
There was only two main tasks to complete for this lab, which were;
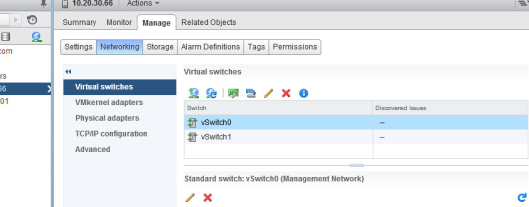
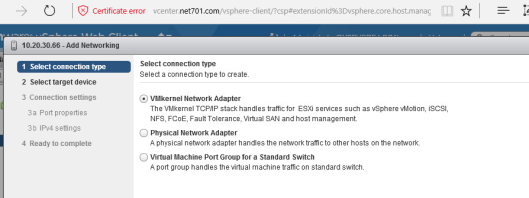
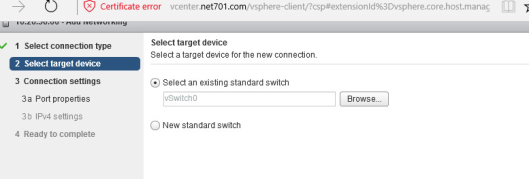
To set the VMkernal port group up, I had to navigate down through hosts and clusters, to the EXSI host, go into the manage tab and select networking. Then select virtual switches and choose vSwitch0. After that I hit the add host networking icon which opened the setup wizard. You can see the steps taken below to complete the setup.
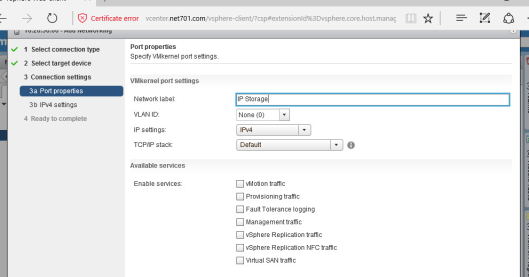
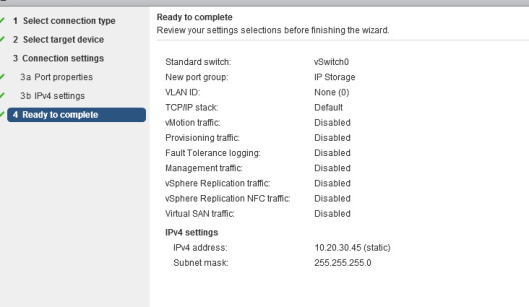
Once these steps had been completed you can now see the new group set up called IP storage.
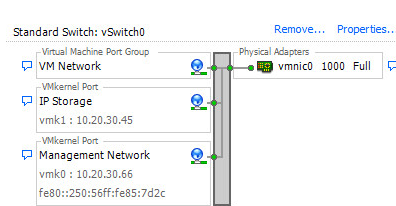
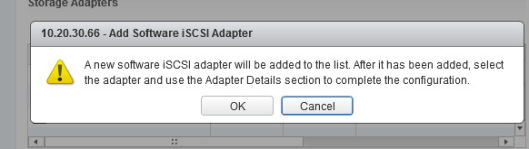
The next thing to do was set up and configure an iSCSI adapter.

Once the setup had been complete the new switch was visible
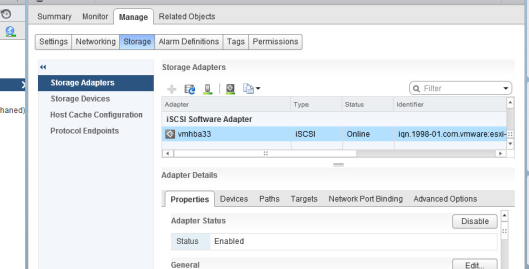
The next thing to do was setup dynamic discovery which would then allow for the storage to be picked up through iSCSI.
14 Monday Nov 2016
Posted in Net701
Tags
The fourth module for netapp heavily focused on configuring the network file system (NFS) and the Common Internet File System (CIFS) on a storage system. To start the Lab off you first had to enter enter licences for NFS and CIFS to be functional. Once that was completed you had to then use the system manager to export a volume, as well as doing it through command line interface (CLI). Moving on from that the next task was to mount exports from the admin host, this was also done through the CLI.
In the windows server you then needed to add remote admin tools as well as IIS, once this had been completed you then needed to add a user into the active directory.
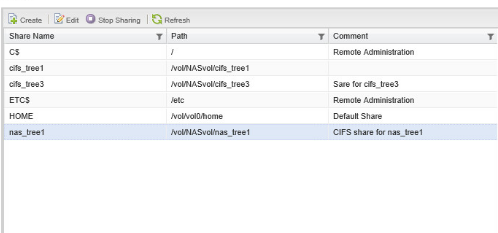
The next task was to create a new NTFS/qtree using the oncommand system manager, once this had been done the next step was to create a share with computer managment to be accessed and then map the shares to drives. Using the CLI you then had to monitor user perms.
Jumping back over to the OCSM you then took a look at the CIFS sessions. Before going back to the CLI to configure SMB 2.0 protocol and then hoping back over to terminate CIFS sessions!
14 Monday Nov 2016
Posted in Net701
Tags
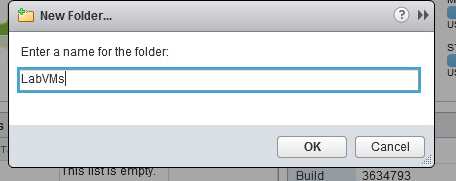
This was a short lab that had only two tasks, the first being to create a host and cluster folder and the second to create VM and templates folder.
The host and cluster folder was created by going into the host and cluster tab, right clicking training and selecting create new folder and new host and cluster folder.
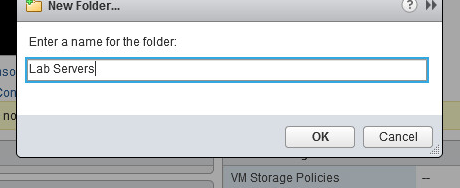
The folder was created by going into VMs and templates and right clicking training again and then selecting create new folder and new VM and template folder.